Tuesday, June 26, 2018

Relax and Enjoy a Giveaway!


Some of my amazing friends got together for a quick giveaway.  We are giving away a $25 TpT gift card.  You only have 1 day to enter so make sure you enter and share with your friends!


a Rafflecopter giveaway


a Rafflecopter giveaway

a Rafflecopter giveaway


a Rafflecopter giveaway
Share:

Friday, June 22, 2018

Word Builders for Small Group Instruction

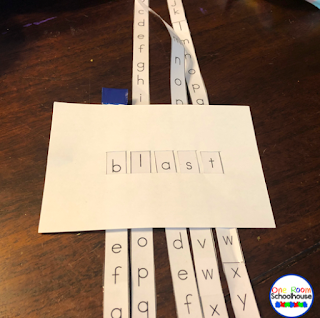
Students use these easy word builders in small group phonics instruction.


Word building is such an important skill for students to practice.  If you're like me, word building materials make you absolutely crazy!  Kids lose the pieces between lessons.  They can't find the letter they need because there are too many pieces.  I've been looking everywhere for something that is easy, practical, and cheap.  I finally figured out a simple solution.  Index Card Word Builders.


1.  First, print out the alphabet in long strips.  To make the letters large enough for students to work with easily, you will need to break the alphabet up and glue the strips together.  You can download my template here.  If you make your own, make sure you leave a large space before 'a' and after 'z.'  (Check out the blue arrow.)  Make sure you laminate the letter strips for durability.

2.  Find the middle of your index card/piece of cardboard.  Hold a strip up to the card and mark on either side.  (You can see my pencil marks.)  Use an Exacto knife to cut the slits.  Slide the letter strips into the card. 


3.  Place a bit of duct tape on each end of each letter strip.  This will help prevent kids from pulling the strip all the way out of the index card. 

4.  Slide the letter strips up and down to build words.  


It's fast and easy for kids to make new words.  There's no searching for pieces.  Just a quick slide and kids can find the letters they need.


Students use these easy word builders in small group phonics instruction.


If you make your Word Builder with 5 spaces but want kids to make a 3 or 4 letter word, kids can move the letter strips at the end of the word to the white space before 'a' or after 'z.'


Share:

Thursday, June 14, 2018

Need for Speed; A Car STEM Project

Cars students made for a STEM Project


Do you need to keep kids engaged the last few weeks of school?  Are your kids bored at home?  STEM camp?  I have the answer for you!  In the South, we get out of school in May.  We spent the last few weeks of school researching and experimenting with Newton's laws.  We used what we learned to create the most aerodynamic cars possible and ended the year with a big race.  The kids had so much fun!  They were so busy learning, they didn't have time to get in trouble!!  I call that the ultimate win!

 We started the unit off by learning about wheels and axles.  We watched a few videos and recorded our findings.  Then, we tried out what we learned.


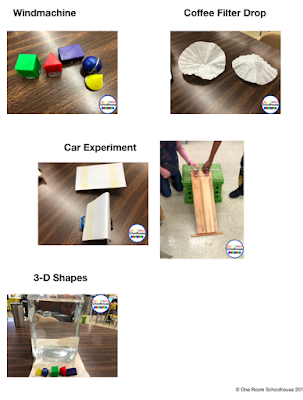
Some experiments students will complete to learn about wheels and axels.


Then, we studied Newton's Second Law of Motion.  Here are a few pictures of our experiments.

Some experiments students did to learn about friction and aerodynamics.

Our next step was to learn about air resistance.  For practical purposes, some of our experiments involved water.  We discussed how water resistance is similar to air resistance.

Experiments students completed to learn about aerodynamics.


I found several different videos of a variety of cars on youtube.  I made QR codes for each video.  Students were able to watch each video and take notes about what they liked or what they might want to try.  

We spent the last few days building, racing, and rebuilding getting ready for the big race.  Here are the cars the kids made.


Cars students created during our STEM project.


The fastest cars from our STEM project race.


Check out the entire unit here .


Share:
© One Room Schoolhouse | All rights reserved.
Blog Layout Created by pipdig