Saturday, September 24, 2016

Awesome Pencil Sharpener

One of the biggest problems we have in the classroom involves pencils.  We can't find them and when we do find them, they are never sharp.  The new Classroom Friendly Pencil sharpener has solved the sharpening part of our problem!  I love how easy it is for my students to use and it's super quiet.  My favorite feature of the pencil sharpener is that when the pencil is sharp, the sharpener will not continue to sharpen the pencil.  I have several students who will continue to sharpen their pencils on my old sharpener until it is about 2 inches long.  The pencil comes out of this sharpener perfect every time!


You know how sometimes pencil lead (especially colored pencil lead) gets caught in the sharpener part and you have to dig around with a paperclip or other device to try to loosen it so you can use the sharpener again?  With this sharpener, you are able to easily remove the sharpener part by turning the base of the handle.  This allows you to pull out the sharpening mechanism and easily remove the lead without damaging your sharpener or hurting yourself!  It slips right back in and turn the base of the handle to lock in place.


If you have never used this type of sharpener before, please take just a second to look over the directions.  It is super easy to use, but if not used properly, you may damage it or hurt yourself.  Simply squeeze the top two black, plastic pieces together and pull out.  Squeeze the two black pieces again and insert the pencil (see picture 2).  Place left hand on top of the yellow part of the sharpener and turn the handle with right hand to sharpen.  When pencil is sharp, it sounds/feels different when you turn the handle.  Even if you continue to turn the handle, it will not continue to sharpen the pencil.  It comes out perfect every time!  You can find out more about this amazing sharpener {HERE}  By the way, it's a lot cheaper than many school sharpeners.  You can get one for about $25 or 3 for about $54.  I paid more than that for my last electric sharpener and it didn't even last the school year.
Share:

Saturday, September 3, 2016

Rounding


Rounding is a concept that many of my kids really struggle with.  A teacher friend shared this idea with me.  Tell students they are shipwrecked on an island.  This island doesn't have anything on it.  However, there is another island nearby that has lots of delicious fruit trees.  There are 9 stones connecting the two islands.  Student 1 decides to jump across the stones to get to the other island.  He jumps on the first stone, but before he can go any further, a huge wave comes.  Ask the student, "Are you going to jump back to the island of nothing, or jump ahead to the island of plenty?"  Student 1 is going to jump back because he is closer to the island of nothing.  Continue this process with a student making it one stone further each time.  When the 5th student jumps to stone 5 ask, "You are exactly in the middle of the two islands.  Are you going to jump back or jump forward to avoid the wave?"  Students should answer forward because if they are half way, why not go forward to where the food is?

Then we related this to numbers.  I gave the students a number such as 52.  I explained that 52 was between 50 (island of nothing) and 60 (island of plenty.)  They were on the 2nd stone.  Which way are they going to jump if the wave came?  This strategy helped my kids see why we round the way we do.  It was so much easier for them then to try to remember some little poem.  I hope this helps your little ones with rounding.  Best of luck this year!
Share:

Wednesday, August 24, 2016

Art in the Special Ed Classroom


We have been in school for almost a month.  (I can't believe it either!)  So far, this is the BEST year yet!  My kids love art and I love teaching through the arts.  I am always on the look-out for amazing art resources to use with my kiddos, but they are hard to come by.  This summer, I found an incredible resource that was created by Whimsy Workshop.  She does ALL of the work for you!  There are background information sheets for each type of art that she includes.  There are 3 art projects for each country, and each project has step-by-step directions with pictures!  Not only are we learning about cultures from around the world and geography, we are also creating lots of art and learning about different techniques. Here are some of the projects we have completed already this year.


Surfers from Australia 

Boomerrangs

Chinese Dragons

Chinese Flower Blossom Fans (before we folded them) 
Koi Fish


 Pretty amazing, huh?!  The techniques that Whimsy Workshop shows, are easy enough for kids of all ages and abilities to be successful!  My kids are so proud of their work!  Check out her product, Art Around the World.

Share:

Friday, July 15, 2016

Back to School Tips and Tricks

I know what you're thinking, "Back to school already?!"  But, some of us, including me, will be heading back to the classroom in just a few weeks.  If you are one of the lucky ones who still have weeks of summer left, just save this post for another day.


1.  Lesson Plans:  Last summer, I worked really hard on my writing lesson plans to make my school year easier.  It worked better than I ever imagined.  I made a list of skills, the order I want to teach them, and notes on anchor charts.   If you go to my TpT store and download the preview, you can try it out for 2 weeks.


You can find it {here} in my TpT store.  You can read more about it {here.}


I love my new Smart Phonics series.  I have been busy working on it this summer.  You can use it on the Smartboard or on an iPad using the app.  You can find it {here}.  There's also a free file so you can try it.  You can read more about it {here.}


2.  Technology:  I use technology everyday in my classroom.  I love my Smartboard and often use it with my Elmo.  All of my students also have their own iPad they can use in class.   Here are a few of my favorite sites that I use with my students.

Nearpod-Nearpod can be used on a computer or on an iPad.  It allows teachers to make their presentations interactive for students.  Teachers can insert videos, quizzes, and other sites for students to explore during the lesson.  Teachers can also add in slides that allow students to write, type, or highlight.  My students will complete 20 problems in math with me using Nearpod with little to no complaint because they only see one problem at a time and they can choose their ink color on the iPad.  You can see a math lesson I prepared for my students {here}.  The best part of Nearpod, it's FREE!


EdTech Software- EdTech Software allows teachers to organize their ebooks in one account.  This not only makes it easy on the teacher, but puts all of the students' books in one place and makes it easy for them to use/find.  This site also allows teachers to customize their textbooks/lessons because they can insert videos, quizzes, games, and other articles.  So, if your school/district has your textbooks online, you will want to check out this site.  You can try it {here} for free.

You can read about some of my other favorite apps {here}


a Rafflecopter giveaway


EdTech Software provided me with compensation in exchange for this sponsored blog post. However, all the opinions expressed here are my own.
Share:

Sunday, July 3, 2016

Oceans of Deals, Steals, and Giveaways


The amazing Cyndie Dunn from Chalk One Up for the Teacher has organized over 80 TpT sellers to offer you all some amazing deals this week!

On Monday, there will be some great $1 deals.  Search #MondayMadness.


On Tuesday, you can get some great resources on sale for 50% off.  Search #2forTuesday.


Wednesday is full of FLASH FREEBIES.  Make sure you follow me on Facebook to get the freebies.


Thursday is deals on bundles.  I will have my writing curriculum and my newest phonics resource on sale.


Friday is a huge giveaway.  There will be 7 $50 gift cards up for grabs.  Check back on Friday for more information on the giveaway!


Share:

Tuesday, June 14, 2016

Dinosaur STEM Unit

The end of the school year is beyond hard.  The kids are tired of school and so are we.  So how do we keep the kids learning?  How about a dinosaur unit?  This isn't your typical dinosaur unit because the focus is on STEM projects.  I integrated math, research, writing, and science.  My kids had a blast!  Here are the STEM projects that we did in our unit.

Dinosaur STEM unit with integrated math, research, writing, and science.

When the kids arrived on Monday, I decorated my door so it looked like giant palm trees.  When students entered the classroom, I had a thunderstorm soundtrack playing in the background.  After the class was settled, I read a letter to them.  It told the students that they were on the field trip of a lifetime.  Together we were going to sail around the coast of Florida.  While we were sailing, a huge storm came out of nowhere.  The ship rocked back and forth (give lots of details to get the kids really involved.)  The letter ends with the boat running ashore and the captain is missing.  The ship has a giant hole and is slowly sinking.  The class works together to get as many supplies as possible off of the ship before it sinks.

STEM Project 1:  Build a shelter so you can stay dry.  The shelter must also withstand a windstorm (hairdryer or small fan.)


Dinosaur Stem Unit with QR codes for easy research


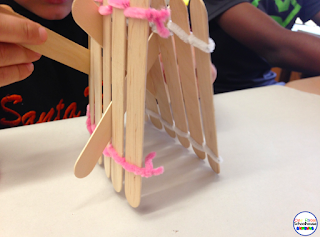
STEM Project 2:  Our shelter is weatherproof and strong.  Now we need something to eat.  While exploring the island, we found a huge grove of fruit trees.  The problem, there's a river between us and the fruit trees.  Bigger problem:  there are huge monsters living in the river.  We must build a bridge to get across the river safely.  Bridge must be at least 7 inches long.

Dinosaur Stem Unit with QR codes for easy research


STEM Project 3:  We made it across the river and collected a lot of fruit, but now we need to keep it dry and away from the animals living on this island.  Students must build a food storage container.  It must float (in case it gets washed into the river) and it must keep the food dry.

Dinosaur Stem Unit with QR codes for easy research


STEM Project 4:  Build a catapult.  We are certain there are dinosaurs roaming the island.  Now we must build a catapult to defend ourselves.

Dinosaur Stem Unit with QR codes for easy research


STEM Project 5:  We decided to make a break for it.  Anything is better than living on this crazy island full of dinosaurs.  Students must build a raft to escape.


STEM Project 6:  Our raft worked, but we will never survive the ocean on a raft without anything else.  What were we thinking?!  We must add a shelter to keep the sun off of us.  We also need to add our food storage container and fresh water.


Success!  We made it to civilization and escaped from this crazy island of dinosaurs!  I hope you will try some of these STEM projects into your dinosaur unit.  I have this entire unit for sale in my TpT store if you want all of the directions in one place and it also includes all of the QR codes to make research a breeze.  


Share:

Friday, May 27, 2016

No Prep, Interactive, Smart Phonics


Do your kids need lots of practice with phonics?  Mine do and they don't like it.  They pretty much hate anything that requires lots of writing so I decided to figure out a way for them to practice the skills in a meaningful way that they would enjoy.  I am blessed that I teach in a tech 1:1 school so all of my kids have an iPad assigned to them.  I went to my tech coach and asked her if she could purchase the SMARTboard app for my class.  She did so I started creating tons of files for my kids.  For short vowels, I have created 7 different activities for them to do using the SMART app.


1.  Build it.  Students use the letter tiles to build the word.There is a box for each phoneme. 
All of the letters are cloned, so students simply touch the letter they need and drag it to the boxes at the top.


This activity looks a little different when students are working with blends.  Some words are short vowels and students are expected to build the entire word.  For words that are more difficult, students are expected to identify the blend and build the blend.  Here's a could of screenshots.


Since students haven't learned vowel pairs, -ue is given.  Students only need to build the blend.


This word is "self."  Students can sound out and spell the entire word.  I know what you're thinking, "How in the world are my kids going to know what word matches that picture?!  I don't have time to pre-teach them all of these words!"  You don't have to, and the students will NOT interrupt you either.  See that yellow star?  When students touch the star, it will say the word for them.  Every picture in the blends files have a yellow star!


2  Build it. Write it.  Students slide the letter tiles down to the first line to build the word. Then they use one of the pens from the Smartboard app to write the word on the handwriting lines.

For blends, I grouped together the silent or difficult sounds.  This is the word "globe."  The "be" are grouped together.  Students can pull down the letters to spell globe and write it on the lines.


 3.  Circle it.  Students use the pen to circle the word that matches the picture. The words are similar so students must read each word carefully.
Here's a sample from the blends file.  As you can see, students are only identifying the blends.  Some words have initial blends others have final blends.  When students touch the star, it will say the word for them.  Every picture in the blends files have a yellow star!


4.  Letterboxes  Students write the word in the letterboxes
Again, the blends file is modified so students are only writing short vowel words (skip) or writing in the blends (sn for snore.) When students touch the star, it will say the word for them.  Every picture in the blends files have a yellow star!


5.  Read it.  Trace it.  Draw it.  Students read the word. Then, they use the pen to trace the word and draw a picture of the word.


For the blends file, I will have my students only do the short vowel words or use it for my higher students who are ready for a challenge.


6.  Spell it.   Students use the pen to circle the beginning,middle, and ending sounds in the word. Then they write the word on the line.   I didn't include this activity for the blends file.
 7.  Write it.  Students write the word that matches the picture.
 For blends, students only write the blend.  As you can see in the picture below, desk has a red line at the end of the word and spoon has a red line at the beginning of the word.  This is a hint for the students as to where the blend is.  They would write "sk" for desk and "sp" for spoon. When students touch the star, it will say the word for them.  Every picture in the blends files have a yellow star!


I am so excited about using this with my students this upcoming school year!  I am working on adding digraphs, long vowels, diphthongs, and more!  You can check out my long vowels bundle.  I have a free sample so you can try it before you buy it!  


Share:
© One Room Schoolhouse | All rights reserved.
Blog Layout Created by pipdig