

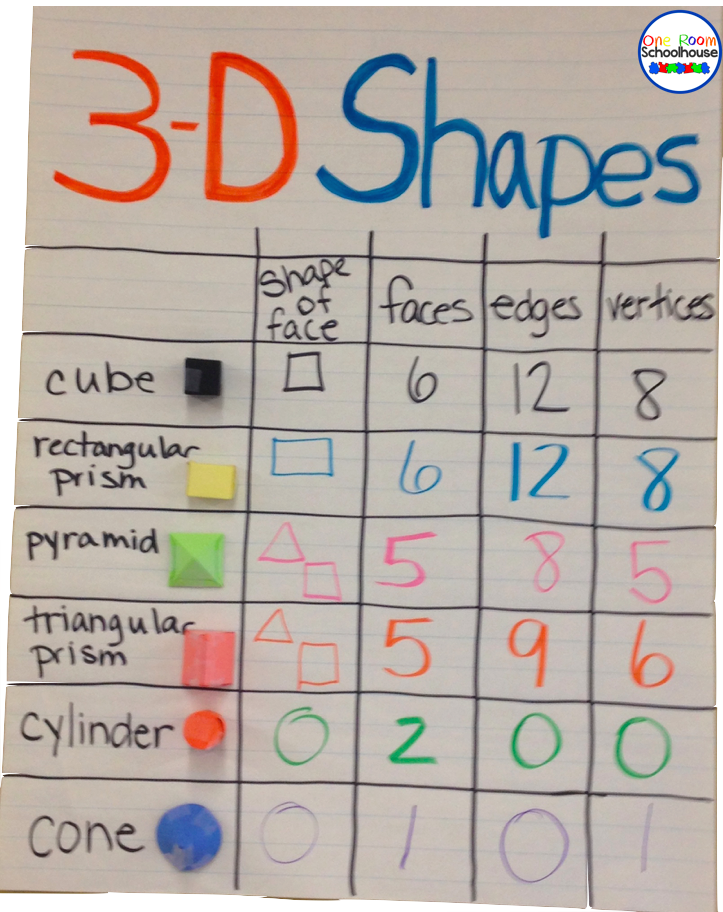
We begin with a quick review of 3-d shapes. I give my students a blank worksheet that matches the above chart, but I don't have anything filled in the chart at the beginning of the lesson. Students work in pairs and each pair has the same shapes as above. (To help my students, all of the same shapes are the same color i.e. all cubes were black.) After students have an opportunity to explore their shapes with a partner and fill in their chart, we come back as a class and fill out the class anchor chart. Students are allowed to correct their chart as we go and we discuss why their answers were correct/incorrect.

When I start my geometry unit, I make a basic chart for vocabulary. We add a hand/arm movement for each term. Here are a few examples. Point, is a fist. Ray are arms out to the side. One hand is a fist (point) and the other hand is out straight (arrow). Line is arms straight out to either side with hands out straight. Parallel lines are arms straight out in front (like train tracks).


Then we dive deeper into triangles. We make an anchor chart together. Then, I give the kids pipe cleaners and they create their own anchor chart. Check out the two examples below. I was super impressed with my kids' work especially since most of my class also have fine motor difficulties.


Then we dive deeper into quadrilaterals.

When I introduce quadrilaterals, I have this entire chart filled out except for the example column. Students are given a chart exactly like this one and a stack of shapes. They work together in pairs to find as many shapes as possible to fill in the example column. After they finish, we come together as a class and discuss it.
After my kids have practiced identifying shapes we end with a huge art project. We use the shapes to create a collage. Students are required to use the shapes to make something that can be identified, realistic art. Then they have to label or point and name the shapes that they used. To stretch my higher students, they have to give me multiple names for the shapes they use.
Check back later on this week to see our projects.
I would love to see some of the amazing anchor charts you use in your classroom. Please post them on my FB page. I love finding new ideas for my students.

No comments
Post a Comment